Shaping the Dough: The Art of Structure and Consistency in Sourdough Baking
Share
Ever wondered how professional bakers achieve those perfectly shaped loaves with a stunning crust and an open crumb? Shaping is the secret! It’s a crucial step in sourdough baking that determines the structure, texture, and appearance of your bread. Proper shaping helps your dough retain its gas bubbles, develop a beautiful crust, and rise to its full potential.
In this guide, you’ll learn:
- Pre-shaping and final shaping techniques.
- How to use a banneton or free-form shaping.
- Tips to avoid degassing your dough and troubleshoot common issues.
1. Why Shaping Matters in Sourdough Baking
Shaping gives the dough its structure, helping it hold its shape during proofing and baking. It also contributes to:
- Crumb Texture: Proper shaping ensures an even distribution of air pockets.
- Rise: Well-shaped dough retains strength for an optimal oven spring.
- Appearance: Achieve a professional, uniform look for every loaf.
Pro Tip: Each shape serves a purpose. Boules are great for rustic loaves, while batards are ideal for slicing into sandwiches. Choose the shape that best suits your recipe and use case!
2. Pre-Shaping: Setting the Foundation
Pre-shaping is the initial step before the final shaping. It organizes the dough, builds tension, and prepares it for its final form.
Steps for Pre-Shaping
- Divide the Dough: Use a bench scraper to divide the dough into equal portions if making multiple loaves.
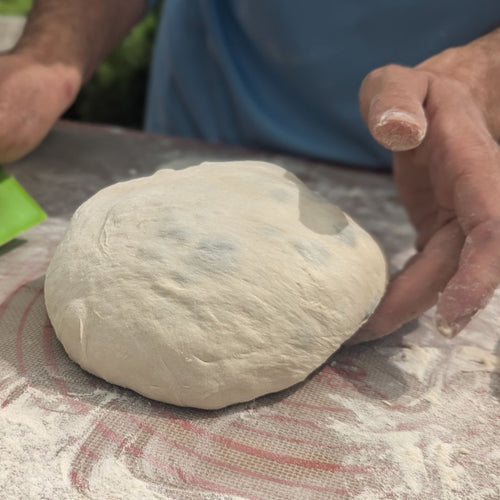
- Form a Loose Shape: Gently fold the edges of the dough toward the center to create a rough ball or oval.
- Rest: Let the pre-shaped dough rest for 20-30 minutes, covered with a damp towel or plastic wrap.
Pro Tip: For high-hydration doughs, pre-shaping is essential to manage stickiness and build initial structure. Don’t skip this step!
3. Final Shaping: Perfecting the Form
Final shaping is where you refine the dough’s shape and tension to prepare it for proofing.
Common Shapes and Techniques
Round (Boule):
-
- Place the dough seam-side down.
- Use your hands to gently pull and rotate the dough, tucking the edges underneath to create surface tension.
Oval (Batard):
-
- Flatten the dough slightly into a rectangle.
- Fold the edges inward, then roll the dough tightly, seam-side down, to create an elongated shape.
Free-Form Loaves:
-
- Shape the dough gently and place it directly on parchment paper for proofing.
Pro Tip: Always handle the dough gently during shaping to avoid tearing or over-degassing.
4. Using a Banneton or Free-Form Shaping
A banneton (proofing basket) is a helpful tool for shaping, but free-form shaping is equally effective for certain recipes.
Why Use a Banneton?
- Provides support for high-hydration doughs during proofing.
- Creates beautiful ridges on the crust.
How to Use a Banneton
- Dust the banneton with rice flour to prevent sticking.
- Place the shaped dough seam-side up into the banneton.
- Cover and proof as directed.
Free-Form Shaping Tips
- Place the shaped dough on a parchment-lined baking sheet for proofing.
- Use a bench scraper to gently adjust the dough’s shape if it spreads too much.
5. Avoiding Degassing During Shaping
Degassing refers to the loss of air bubbles in the dough, which can result in a dense crumb. To preserve those pockets of gas:
- Handle Gently: Avoid pressing too hard during shaping.
- Minimize Movement: Work quickly and efficiently.
- Use Light Pressure: Shape with a light touch to maintain the dough’s structure.
Pro Tip: Practice makes perfect! With time, you’ll develop a feel for the right amount of pressure and handling.
6. Common Shaping Problems and Fixes
Dough is Too Sticky
- Cause: High hydration or insufficient flour on your hands/surface.
- Fix: Lightly dust your hands and work surface with flour, but avoid over-flouring.
Dough Tears During Shaping
- Cause: Overproofing or weak gluten structure.
- Fix: Shorten proofing time and perform more stretch-and-folds during bulk fermentation.
Dough Spreads Too Much
- Cause: Underdeveloped tension or weak gluten.
- Fix: Ensure a tight surface tension during final shaping and consider using a banneton.
7. FAQ: Shaping Basics
How Long Should I Rest Dough After Pre-Shaping?
Allow 20-30 minutes of rest for the dough to relax before final shaping.
Can I Skip Pre-Shaping?
Skipping pre-shaping can make the dough harder to handle, especially for high-hydration recipes.
What’s the Best Way to Shape High-Hydration Doughs?
High-hydration doughs benefit from extra pre-shaping and the use of a banneton for support.
Ready to Shape Like a Pro?
Shaping your dough is a rewarding skill that elevates your sourdough baking. If you want to master this step and learn hands-on techniques, join our sourdough baking classes at Sherwood Coffee 'n' Bread in Albuquerque.
Dive Deeper into Sourdough Baking
Shaping is just one step in the sourdough journey. For a comprehensive guide to mastering sourdough bread, check out our Master Sourdough Baking: Step-by-Step Guide and Resources.