Homemade Pita Bread: A Step-by-Step Recipe and My Journey with It
Share
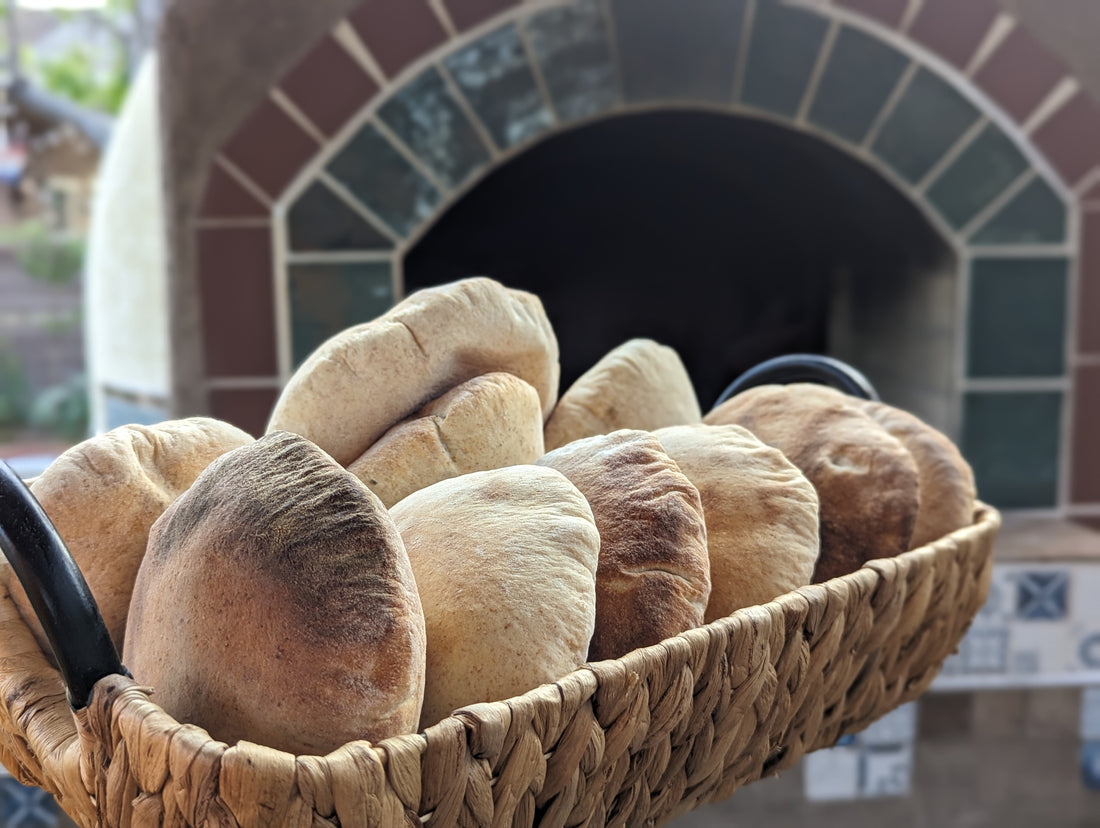
There’s something about making bread that always felt magical to me. And when it comes to pita bread, that magic is even more special. The warm, soft texture, the classic pocket perfect for stuffing - pita bread has always been a favorite in my kitchen.
Today, I’m excited to share not just a recipe, but my own journey in mastering this delicious bread. Whether you’re an experienced baker or just getting started, I hope my story and this recipe inspire you to try making pita bread at home. Plus, if you’re looking to take your skills further, our Flatbreads in Brick Oven cooking classes offer the perfect opportunity to do just that.
My Journey with Pita Bread
When I first set out to make pita bread, I was drawn to its simplicity. Flour, water, yeast - how hard could it be, right? But as anyone who’s tried making pita at home knows, achieving that perfect puff with a tender pocket can be tricky. My first few attempts were far from perfect, but with each batch, I learned something new. I tweaked the recipe, adjusted the technique, and over time, I found my groove. Now, I’m thrilled to share the recipe that’s become a staple in my kitchen.

Ingredients for My Perfect Pita Bread
Here’s what I use to make about 8 pita breads:
- 180 ml warm water (¾ cup, around 110°F, to activate the yeast)
- 7g active dry yeast (1 package, 2¼ teaspoons)
- 15g sugar (1 teaspoon plus 1 tablespoon, divided)
- 469g bread flour (3¾ cups, plus more for dusting)
- 9g sea salt (1½ teaspoons)
- 42g extra-virgin olive oil (3 tablespoons, plus more for the bowl)
- 180g whole-milk Greek yogurt (¾ cup)
Step-by-Step Instructions for Perfect Pita Bread
1. Activate the Yeast
In a large mixing bowl, I combine the warm water, 5g (1 teaspoon) of sugar, and the yeast. I give it a gentle stir and let it sit for about 5 minutes until the mixture becomes frothy. Watching the yeast come to life always reminds me of the magic in baking.
2. Prepare the Dough
Next, I add the remaining 10g (1 tablespoon) of sugar, bread flour, and sea salt. After mixing until just combined, I stir in the olive oil and Greek yogurt. The dough starts to come together, slightly sticky but manageable - a sign that we’re on the right track.
3. Knead the Dough
I turn the dough out onto a floured surface and knead it for about 10 minutes. There’s something therapeutic about this process - the repetitive motion, the transformation from sticky mess to smooth, elastic dough. If it’s too sticky, I add a little more flour, but just enough to keep it from sticking to my hands.
4. First Rise
Once the dough is kneaded, I place it in a lightly oiled bowl, turning it to coat with oil. Covering the bowl with a clean kitchen towel, I set it in a warm spot and let it rise for about 1 to 1.5 hours, until it doubles in size. This is the part where patience pays off.
5. Shape the Pitas
After the rise, I punch down the dough to release any air bubbles and divide it into 8 equal portions. Each piece is rolled into a ball, then rested for 10 minutes under a towel. This rest is key - it makes the dough easier to roll out. I then roll each ball into a circle about ¼ inch thick, aiming for even thickness to ensure that classic puff.
6. Preheat and Bake
Preheating the oven to 475°F is crucial. If you have a baking stone, use it - it helps create the best puff. I place 2-3 dough circles at a time onto the hot stone and bake for 3-5 minutes, watching them puff up like magic. They should be slightly golden and beautifully puffy.
7. Cool and Serve
After baking, I cover the pitas with a clean towel to keep them soft. They’re best enjoyed warm, right out of the oven, but they store well for a few days if you can resist eating them all at once.

Secrets to Making Perfect Pita Bread
Over the years, I’ve picked up a few tricks to ensure my pita bread turns out perfectly every time:
- Water Temperature Matters: If the water is too hot, it can kill the yeast; too cool, and the yeast won’t activate properly. A thermometer can be your best friend here.
- Don’t Rush the Rest: Letting the dough rest between steps really makes a difference. It relaxes the gluten, making it easier to roll out and giving the bread a better rise.
- High Heat is Key: A super hot oven is crucial for that quick puff. Preheating your baking stone (or an upside-down baking sheet) helps get the perfect result.
Why Greek Yogurt?
I love using Greek yogurt in my pita dough because it adds a subtle tang and richness that takes the flavor up a notch. It also keeps the pitas soft and tender, even after they cool. If you’ve ever had a pita that’s dry or tough, this little addition will make all the difference.
Bringing It All Together
There’s something deeply satisfying about baking your own bread, especially pita bread. The process, the aroma, the moment they puff up in the oven - it’s all part of the magic. This recipe has become a favorite in my home, and I hope it brings the same joy to your kitchen. And if you’re as passionate about flatbreads as I am, I’d love to see you in one of our Flatbreads in Brick Oven cooking classes. We explore not just pita, but other delicious breads like Barbari, Focaccia, and more - all baked to perfection in our wood-fired brick oven.
Join Our Pita Bread Baking Classes in Albuquerque
If you’re intrigued by this recipe but want to dive even deeper, I’d love for you to join one of our Pita Bread Baking Classes. Here in Albuquerque, we offer hands-on cooking classes where you can perfect your pita-making skills in a fun, supportive environment. There’s nothing like learning together, sharing tips, and enjoying freshly baked bread right out of our wood-fired brick oven.
Conclusion
Making pita bread at home is a journey worth taking. With this recipe and a few simple tips, you’ll be able to create delicious, homemade pitas that are far superior to anything store-bought. Give it a try, and I think you’ll find that baking pita bread isn’t just about the end result - it’s about the joy of the process itself. And if you want to take it to the next level, our cooking classes in Albuquerque, especially the Flatbreads in Brick Oven series, are always here to help you master the art of baking.
