Proofing the Dough: Perfecting Flavor and Texture in Sourdough Bread
Share
Proofing is one of the most critical steps in sourdough baking. It’s during this phase that your dough develops its final structure, texture, and flavor. Whether you’re proofing overnight in the fridge or timing it perfectly at room temperature, understanding this stage is essential for consistent, high-quality bread.
In this guide, we’ll cover:
- Understanding the stages of proofing.
- Cold-proofing overnight for enhanced flavor.
- Signs your dough is ready to bake, with practical examples.
1. What is Proofing?
Proofing, also known as the second rise, is the final fermentation stage where the shaped dough develops its final texture and flavor before baking. During proofing:
- Yeast Ferments: Producing carbon dioxide, which expands the dough.
- Enzymes and Bacteria Work: Developing complex flavors.
- Gluten Relaxes: Allowing the dough to rise and hold its shape.
2. Understanding Proofing Stages
First Proofing Stage: Bulk Fermentation
Before shaping, the dough undergoes bulk fermentation, where it rises as a single mass. This stage develops strength and initial flavor.
Second Proofing Stage: After Shaping
The second rise occurs after shaping, allowing the dough to relax and fully develop its final structure.
Example Timing for Room-Temperature Proofing:
- Low Hydration (50-60%): 1-2 hours at 75°F.
- Medium Hydration (65-75%): 2-4 hours at 75°F.
- High Hydration (75-85%): 4-6 hours at 75°F.
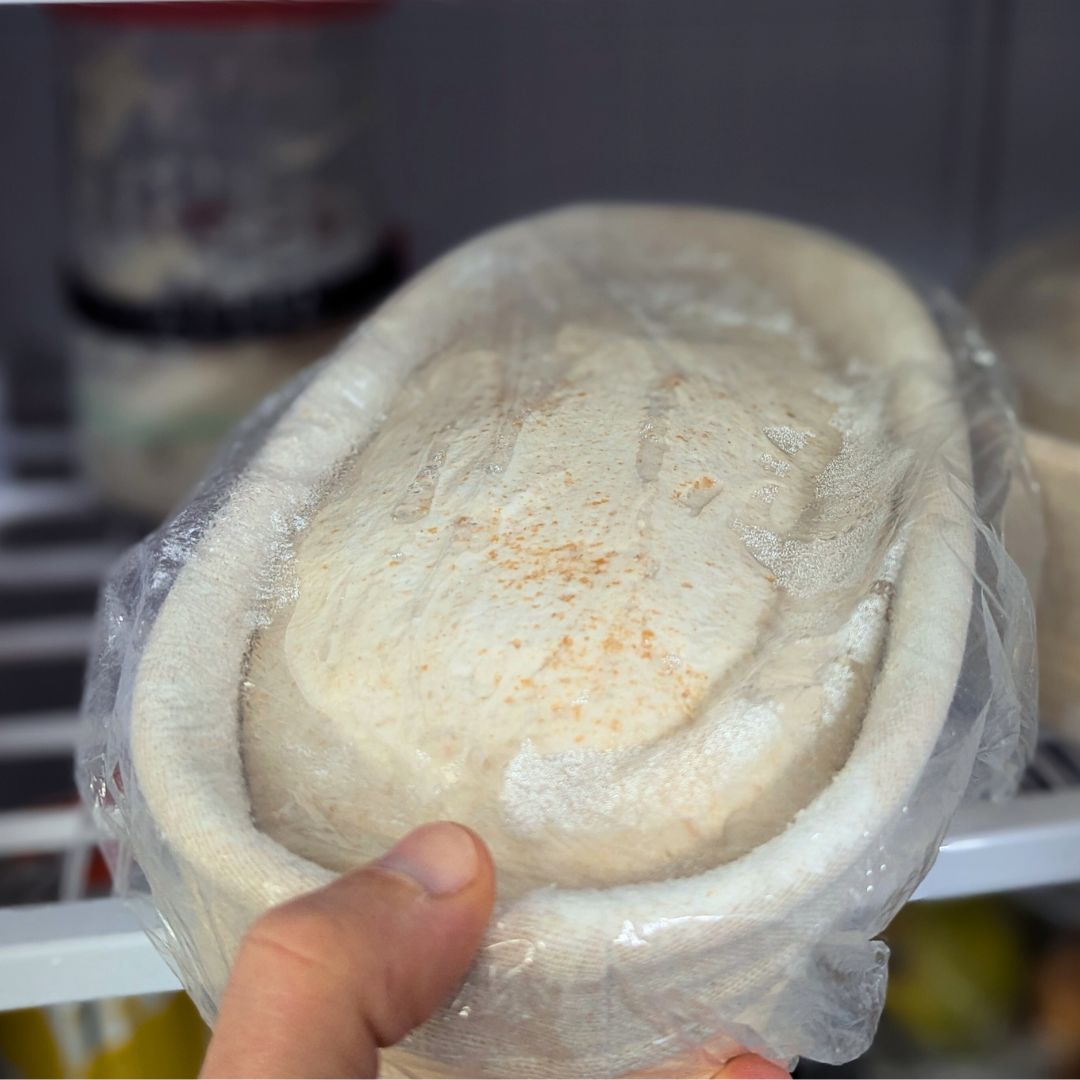
3. Cold-Proofing Overnight for Flavor
Cold-proofing (retarding) involves slowing down fermentation by placing the dough in the refrigerator. This enhances flavor and makes the dough easier to handle.
Benefits of Cold-Proofing
- Enhanced Flavor: Longer fermentation allows for greater flavor complexity.
- Convenience: Proof the dough overnight and bake the next day.
- Easier Handling: Chilled dough is less sticky and easier to score.
How to Cold-Proof
- After shaping, place the dough in a banneton or proofing container.
- Cover it tightly to prevent drying out.
- Refrigerate at 38°F-42°F.
Cold-Proofing Timing Examples
- Mild Sourdough Flavor: 8-12 hours in the fridge.
- Medium Tang: 12-16 hours in the fridge.
- Strong Flavor: Up to 24 hours in the fridge.
Pro Tip: Cold-proofing longer than 24 hours may result in over-fermentation, leading to sour flavors and weakened gluten.
4. Signs Your Dough is Ready to Bake
Knowing when your dough is perfectly proofed is key to achieving the best results. Here are the main indicators:
Visual Cues
- The dough should increase in size by 50-75%.
- Bubbles should appear on the surface or just beneath it.
Touch Test
- Gently press your finger into the dough. If the indentation springs back slowly and partially, it’s ready.
- If it springs back too quickly, it needs more time. If it doesn’t spring back at all, it’s over-proofed.
Float Test (Optional)
- Take a small piece of dough and place it in water. If it floats, the dough is proofed.
Pro Tip: Chilled dough may not pass the float test but can still be perfectly proofed. Always combine visual and touch cues with timing.
5. Common Proofing Problems and Fixes
Over-Proofed Dough
- Cause: Left to proof too long, breaking down the gluten structure.
- Fix: Degas the dough gently, reshape, and proof for a shorter time before baking.
Under-Proofed Dough
- Cause: Insufficient proofing time, leading to dense bread.
- Fix: Allow the dough to proof longer and monitor closely.
Dry Dough Surface
- Cause: Inadequate covering during proofing.
- Fix: Always cover the dough with plastic wrap or a damp cloth to prevent drying out.
6. FAQ: Proofing Basics
Can I Skip Cold-Proofing?
Yes, but you may sacrifice some flavor complexity. Room-temperature proofing is quicker but results in milder-tasting bread.
What’s the Ideal Proofing Temperature?
For room-temperature proofing, aim for 75°F-80°F. For cold-proofing, keep your refrigerator at 38°F-42°F.
How Do I Know if I Over-Proofed My Dough?
Over-proofed dough will feel overly slack, and the structure may collapse when handled.
Ready to Perfect Your Proofing?
Proofing is an art that takes practice, but it’s one of the most rewarding steps in sourdough baking. If you’re ready to master proofing techniques, join our hands-on sourdough baking classes at Sherwood Coffee 'n' Bread in Albuquerque. Learn how to proof like a pro and bake sourdough that’s flavorful and beautifully textured.
Dive Deeper into Sourdough Baking
Proofing is just one step in the sourdough journey. For a comprehensive guide to mastering sourdough bread, check out our Master Sourdough Baking: Step-by-Step Guide and Resources.