How to Bake Sourdough in a Wood-Fired Oven: A Complete Guide
Baking 16 Loaves with a Single Firing

Baking sourdough bread in a wood-fired brick oven is a completely different experience compared to using a conventional home oven. Heat management, firing strategy, and steam control all play critical roles in achieving the perfect loaf.
Recently, I tested my oven by baking 16 loaves of sourdough in a single firing. This guide covers everything you need to know about managing fire, loading bread, and optimizing your baking process for consistent results in a wood-fired oven.
Fire & Heat Management: Planning a Two-Day Firing Process
Unlike conventional ovens, a brick oven requires strategic heat saturation. Since this bake involved two batches, I used a two-day firing method to ensure stable heat retention.
Day 1: Priming the Oven

The day before baking, I lit a small fire to gradually warm up the oven. This helps to:
- Preheat the bricks to around 350°F to prevent extreme heat fluctuations the next day.
- Ensure even heat distribution for a more predictable bake.
I maintained a small fire for a few hours, then closed the oven door overnight to allow the bricks to absorb and hold heat.
Day 2: Full Firing & Baking Prep

The next morning, the oven was pre-warmed and ready for the main firing.
- I started with a medium fire (1-2 hours) to gradually build up heat.
- Then, I increased the fire to high heat (750-950°F) for another 2 hours to fully charge the bricks.
- During this time, I took advantage of the high temperature to bake pizza or flatbreads before letting the oven settle.
Once the oven reached peak heat, I closed the door at around 650°F for 30 minutes. This step allows the heat to evenly distribute throughout the bricks before cleaning out the embers and preparing for the bread bake.
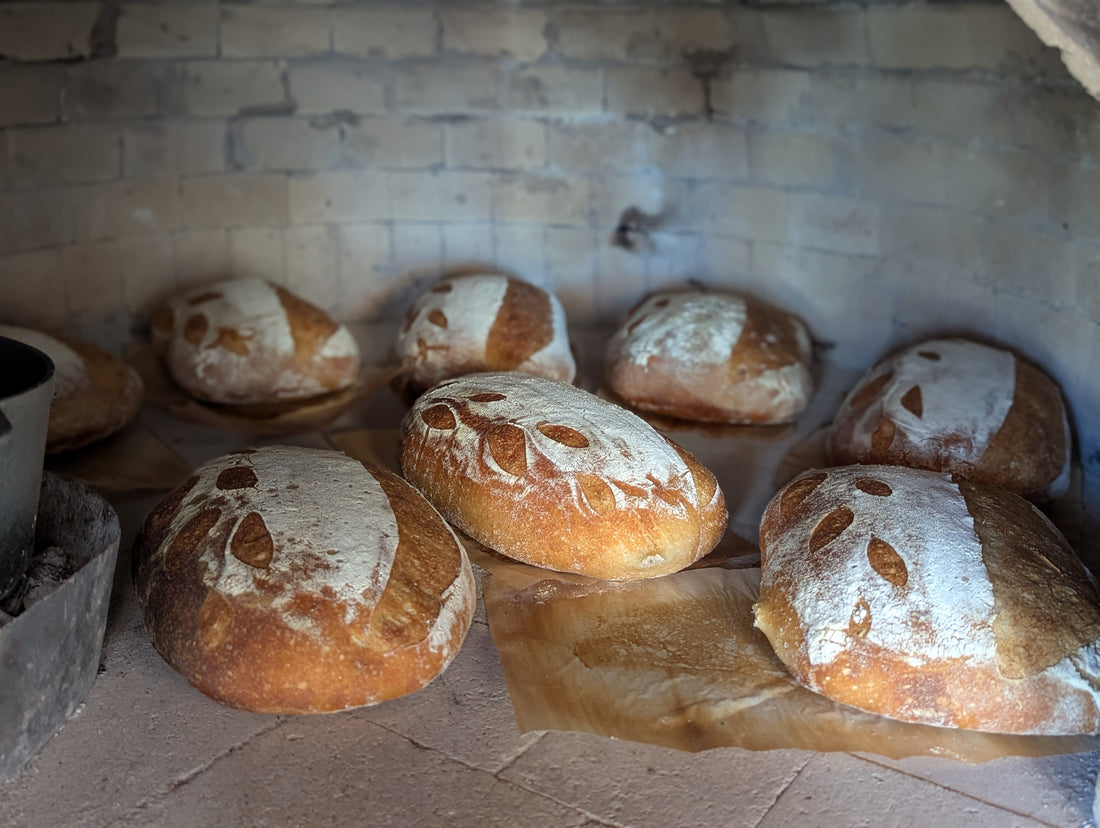
Loading & Baking: Managing Two Batches
Since my oven can hold 8 loaves (2 lbs. each) per batch, I needed to plan my loading and baking carefully.

- Floor temperature is the key factor - for bread baking, only the floor temp matters, not the air temp.
- I used an infrared thermometer to measure multiple spots on the oven floor to ensure even heat distribution.
- If I found hot or cold spots, I took notes so I could adjust my firing strategy next time.
Batch 1: Baking at 500°F (Floor Temp)

- The first batch was loaded when the floor temp hit 500°F.
- At this high temperature, proper steam is critical to keep the crust from hardening too soon.
- I used a cast iron pan with lava rocks for initial steam, but since brick absorbs a lot of moisture, I also sprayed a fine mist directly onto the loaves using a sprayer.
- Total bake time: ~25 minutes.
Batch 2: Baking at 450°F (Floor Temp)
- After the first batch, the oven naturally dropped to 450°F, making it ideal for the second bake.
- Less steam was required since the lower temperature slowed crust development.
- Total bake time: ~30 minutes.
💡 Want to bake sourdough at home without a brick oven? Check out my Complete Sourdough Baking Guide for tips on achieving bakery-quality results in a conventional oven.
Crust & Flavor: Why a Brick Oven Makes the Difference

Baking in a wood-fired oven gives bread a unique crust and flavor profile that is difficult to replicate in a conventional home oven.
- Radiant heat significantly speeds up baking - expect 30-40% shorter bake times than in a regular oven. Adjust accordingly to prevent overbaking.
- High initial heat creates superior oven spring, giving loaves a lighter crumb and an aerated structure.
- The retained heat caramelizes the crust, leading to a deep, complex flavor and natural blistering.
A key takeaway from this bake was that monitoring steam levels was crucial - with a wood-fired oven, brick absorbs a lot of moisture, so direct misting with a sprayer helped create a proper crust without drying out the surface too soon.
Lessons Learned: What Worked & What I’d Improve
- Pre-firing the oven made a huge difference. Allowing heat to saturate overnight led to better temperature stability.
- Using an infrared thermometer was essential. Measuring the floor temp in multiple areas helped avoid uneven baking.
- Starting at 500°F required more steam. Next time, I may start slightly lower (~480°F) for a more controlled first batch.
- Using high heat for pizza before baking was a great way to optimize fuel.
Want to Master Wood-Fired Sourdough? Join Our Hands-On Baking Class!

If you’re passionate about baking sourdough in a wood-fired oven but want to refine your technique, join us at Sherwood Coffee n Bread for a hands-on sourdough baking class in Albuquerque.
Learn how to properly fire the oven, manage heat for multiple bakes, and perfect your crust and crumb texture - all while baking alongside fellow bread enthusiasts. Whether you're a beginner or an experienced baker looking to level up your skills, this class will help you gain confidence in baking with fire.
Final Thoughts: Mastering Large-Scale Sourdough Baking in a Wood-Fired Oven
Baking 16 loaves with a single firing required careful planning, but the results were worth it. The two-day firing method proved to be a game changer for heat stability and efficiency. If you’re baking sourdough in a brick oven, using floor temperature as your main guide, adjusting steam levels, and taking detailed notes will help you improve each time.
Have you baked sourdough in a brick oven? What techniques have worked for you? Let’s talk in the comments!
About the Baker & the Oven That Started It All

I’m Igor, the baker behind Sherwood Coffee n Bread, and my passion for wood-fired baking led me to build my own brick oven from scratch. Inspired by Uzbek, Mediterranean, and New Mexican traditions, my 42-inch oven was designed to hold heat for days, allowing me to bake with precision and consistency.
Baking with fire is a challenge, but it’s also deeply rewarding - every loaf is a lesson in timing, technique, and tradition. If you love the art of bread baking, I invite you to join me for a hands-on class and experience the magic of fire-baked sourdough.